Joystick Loader Kits: Enhancing Tractor Control and Efficiency
Adding a joystick control system to your tractor's loader significantly improves ease of use and operational efficiency. This instructional guide details the process of installing a custom joystick kit, covering various system types and installation approaches. Whether you opt for a pre-assembled complete kit or a build-your-own option, understanding your tractor's hydraulics is paramount for a successful and safe installation. For more detailed information, check out this helpful resource.
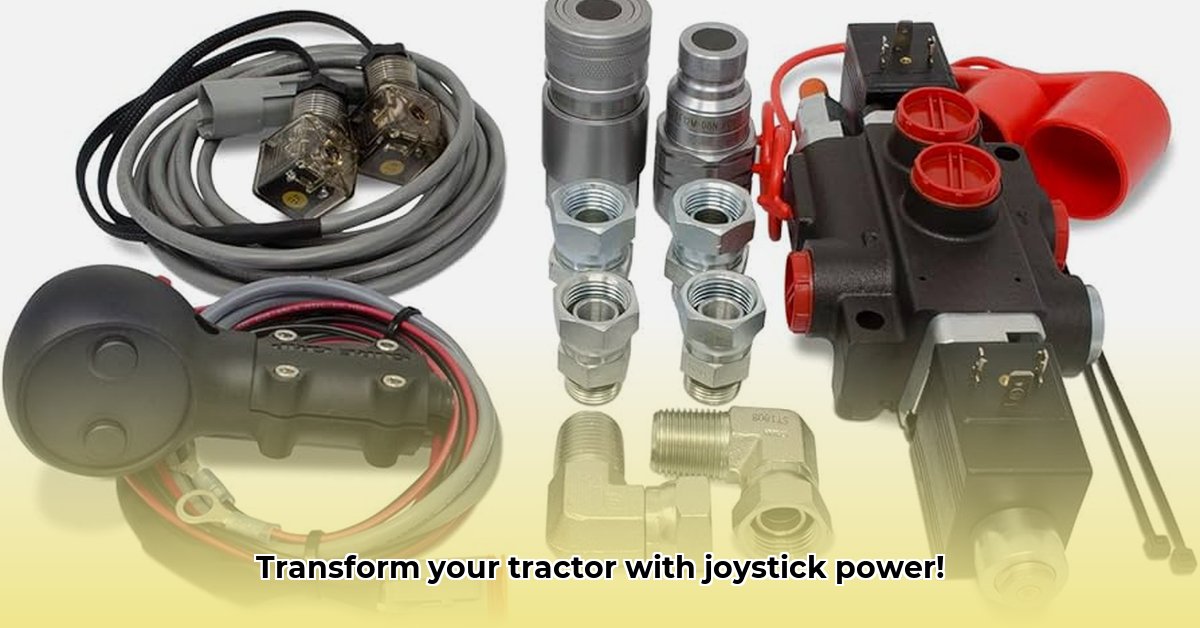
Understanding Your Tractor's Hydraulic System
Before beginning any installation, understanding your tractor's hydraulic system is critical. There are three primary types:
- Open-center systems: These systems constantly circulate hydraulic fluid, even when the loader isn't operating. They are generally easier to work with for joystick kit installations. (Think of a constantly running water wheel.)
- Closed-center systems: Fluid only moves when a control is activated, resulting in greater efficiency and precise control. Installation is more complex due to the need for precise pressure and return line management. (Imagine a precisely regulated water flow system.)
- Load-sense systems: These advanced systems automatically adjust hydraulic flow based on the load, maximizing efficiency and minimizing pump strain. Installing a joystick kit on a load-sense system requires advanced hydraulic knowledge and is best left to professionals. (This is like a smart irrigation system automatically adjusting water flow based on soil moisture.)
A visual diagram showcasing the key components of each system type would be beneficial here. Choosing the correct kit hinges directly upon identifying your tractor's system. Incorrect selection can result in damage to the tractor's hydraulics.
Choosing the Right Joystick Kit
Selecting the appropriate kit is crucial for a smooth installation and optimal performance. Consider these factors:
Complete Kits vs. Build-Your-Own: Pre-assembled complete kits offer convenience but are generally more expensive. Build-your-own kits provide greater customization but demand more technical expertise. A complete kit is generally recommended for first-time installers.
Number of Functions: Determine whether a two-function (lift/tilt) or a three-function (or more) kit best suits your needs. More functions increase complexity and cost.
Compatibility: Ensure compatibility with your tractor's hydraulic system, quick couplers, and other components. Double-check specifications before purchasing. Incompatibility can lead to installation failure or damage.
Hydraulic System Type Match: The chosen kit must align with your tractor's hydraulic system (open, closed, or load-sense). Mismatched kits will likely not function correctly.
Step-by-Step Installation Guide
Safety First: Always disconnect the tractor battery's negative terminal before beginning any work on the hydraulic system. Hydraulic systems operate under high pressure; improper handling may cause severe injury. Wear safety glasses and gloves at all times. Professional installation is recommended, especially for closed-center and load-sense systems.
This guide uses a complete kit as the example. Build-your-own kits will require significant adaptation and broader hydraulics knowledge. Always refer to your specific kit’s instructions.
Step 1: Preparation: Gather all necessary tools, parts, and the kit’s instruction manual. Ensure a clean and well-lit workspace.
Step 2: Identifying Hydraulic Lines: Accurately identify the pressure and return lines on your tractor. Consult your tractor's service manual if needed. Incorrect identification can lead to hydraulic system damage.
Step 3: Installing the Control Valve: Securely mount the hydraulic control valve in an easily accessible location. Proper alignment and secure mounting are critical for optimal performance.
Step 4: Connecting Hydraulic Lines: Connect the high-pressure lines from the valve to your tractor's hydraulic system. Use appropriate fittings and hoses to ensure a leak-free connection. Double-check all connections.
Step 5: Connecting Electrical Wiring: Connect the electrical wiring according to the kit’s instructions. Proper electrical connections are essential for correct joystick functionality.
Step 6: Mounting the Joystick: Install the joystick in a comfortable and ergonomically sound position, ensuring a secure attachment to the control valve. Proper ergonomics will improve operator comfort.
Step 7: Bleeding the System: After connections are complete, carefully bleed the air from the hydraulic system to remove any air bubbles. Air in the system will significantly impact performance. Refer to the kit instructions for the appropriate procedure.
Step 8: System Testing: Thoroughly test the system, starting with slow movements to ensure all functions (lift, tilt, etc.) operate correctly. Address any issues before resuming normal activity.
Troubleshooting Common Issues
- No Response: Verify all connections and ensure proper power supply. Bleed the system again if necessary.
- Intermittent Operation: Check for loose connections, air in the system, or faulty wiring.
- Leaks: Tighten fittings or replace damaged hoses. Persistent leaks require professional assistance.
Maintenance and Continued Operation
Regular inspection of hoses, connections, and wiring is crucial for preventing system failures. Check for leaks, worn hoses, and damaged components at regular intervals. Refer to your tractor’s service manual for recommended hydraulic fluid changes. Proactive maintenance extends the lifecycle of your system.
Conclusion
Installing a custom tractor joystick kit enhances operational efficiency and comfort. This guide provides a general framework; always prioritize safety and consult your specific kit's instructions and your tractor's service manual. If uncertain about any step, seeking professional assistance is recommended. Remember that proper installation and routine maintenance are essential for long-term system reliability.